There’s no doubt that concrete block is a hugely versatile building material. With CMU blocks, you can create structures as small as backyard fire pits or as large as home foundations. But we’ll admit, it requires skill (and a lot of patience) to work with. When you search, “how difficult is it to lay concrete block?” you’ll find a lot of forums with curt answers like “difficult.” “just hire a mason…” and “how are your hands?”
What if we told you that building walls, foundations, outdoor fireplaces, and more could be a whole lot easier—for builders, landscapers, and motivated DIYers alike? Inspired by German-style concrete wall systems, Comfort Block introduces precision-ground interlocking concrete block technology to make construction faster, easier, and more precise.
What is Comfort Block?
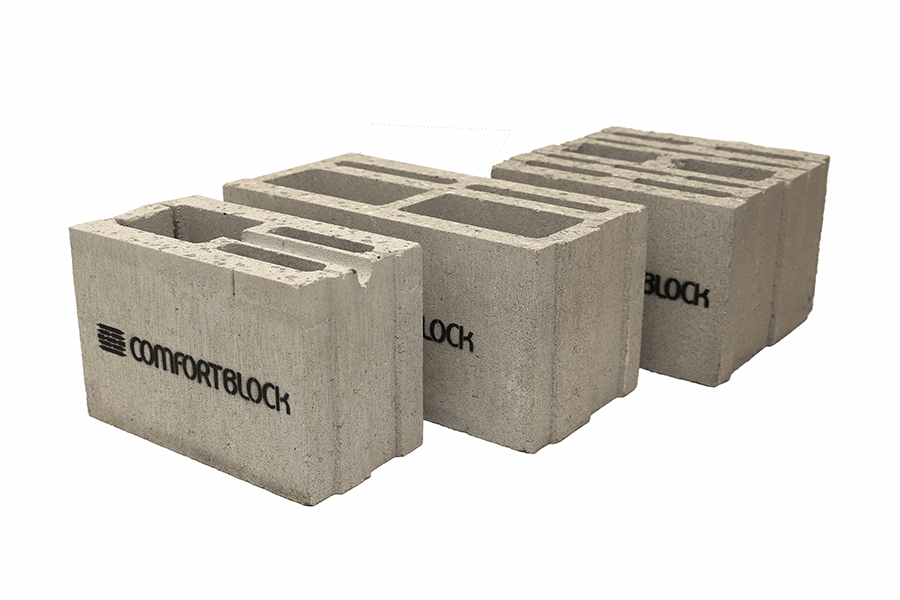
Comfort Block is a concrete wall system that stacks and glues interlocking concrete blocks with masonry adhesive to allow you to build garages, sheds, outdoor kitchens, retaining walls, and more quickly and easily. The system was introduced as the first of its kind in the United States back in 2015.
Like all concrete products, they are resistant to fire, insects, winds, flooding, and mold or rot. By designing these CMU blocks with interlocking head joints and grinding the blocks to precise dimensions, Comfort Block eliminates the need for mortar beyond leveling the base. Instead, masonry adhesive is used to create thin joints that remain level during the entire construction. That means no need to mix mortar, no messy cleanup, and no prior masonry experience is required to achieve secure, level structures. Plus, these interlocking concrete blocks are available in multiple sizes to fit the varying needs of your project.
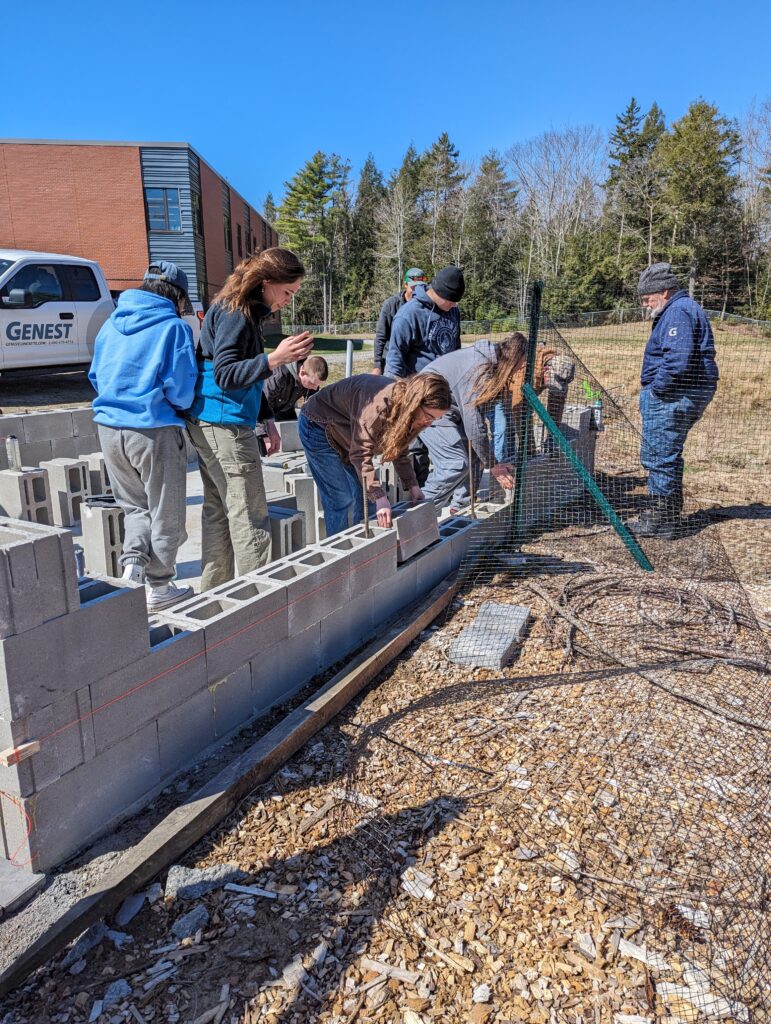
In fact, laying concrete block from Comfort Block is so simple that a group of teens from Mount Ararat High School in Topsham, Maine recently helped build a concrete wall system for their new school greenhouse. As part of Maine Landscape & Nursery Association’s (MELNA) community outreach project, MELNA and a Comfort Block mason guided the students through the installation process. The Comfort Block walls for this 18’ by 9’ structure were constructed, grouted, and weatherproofed during a single school day!
Comfort Block is manufactured using Genest’s low carbon concrete, G-Mix, to provide builders and homeowners with a sustainable option. They are manufactured with locally sourced aggregate, up to 55% recycled materials, and less cement than traditional concrete blocks. Their strength and durability give them a longer lifespan than some other building materials and can increase your structure’s energy efficiency.
Integrated electrical channels allow you to easily install your electrical system after constructing the wall without any furring. Just cut a hole wherever you need to insert an outlet box.
Non-insulated vs Insulated Concrete Blocks
When working with Comfort Block, you have the option to choose insulated CMU blocks when using the 12” or 16” thick systems for the exterior walls. The built-in channels of these insulated concrete blocks are fitted with up to 3 internally integrated layers of EPS inserts. Plus, the thermal mass of the concrete contributes to higher temperature stability, giving Comfort Block’s 16” CB-16 concrete wall systems an estimated R-30+ to keep your home’s interior more comfortable and energy efficient.
What Can Interlocking Concrete Block Be Used For?
The appropriate application of these interlocking concrete blocks will depend on the Comfort Block system you choose, but here are a few projects where these innovative CMU blocks work well:
- Fireplaces
- Pizza Ovens
- Outdoor Kitchens
- Landscape & Retaining Walls
- Sheds
- Garages
- Greenhouses
- Pool houses
- Home Foundations & Whole Home Construction
- Large Scale Commercial Projects
How to Lay Concrete Block
Luckily, with Comfort Block, learning how to lay concrete block that will last for years to come and look great in your home or landscape is easy. For the sake of this guide, let’s assume you’re building a small shed where the concrete foot has already been poured. Follow the steps below to start laying concrete block or watch this video tutorial for a visual on the process.
Tools You’ll Need
Before you get started on your block wall installation, make sure you’ve prepared the correct tools and accessories. You can stop by one of the 3 Genest locations to pick up your tools or contact our team to pre-order any specialty items like precast concrete lintels. Here are the basic tools you’ll need to assist with your Comfort Block project:
- Your chosen CB System
- Comfort Block Approved Masonry Adhesive
- Kangaroo Can Holder
- Mortar Leveling Kit
- 4-foot Level
- Mortar
- Sturdy Work Gloves
- Rubber Mallet
- Finishing Coat such as Stucco, Plaster or Veneer Stone
Step 1: Layout
As with any building project, following the philosophy of “measure twice, cut once,” should be applied when laying concrete block—meaning preparation is the most important step. Before construction of your Comfort Block concrete wall system, ensure that all wall dimensions conform to the block dimensions to reduce gapping and cutting. Any steel reinforcement should be located according to engineering recommendations before the base course is constructed.
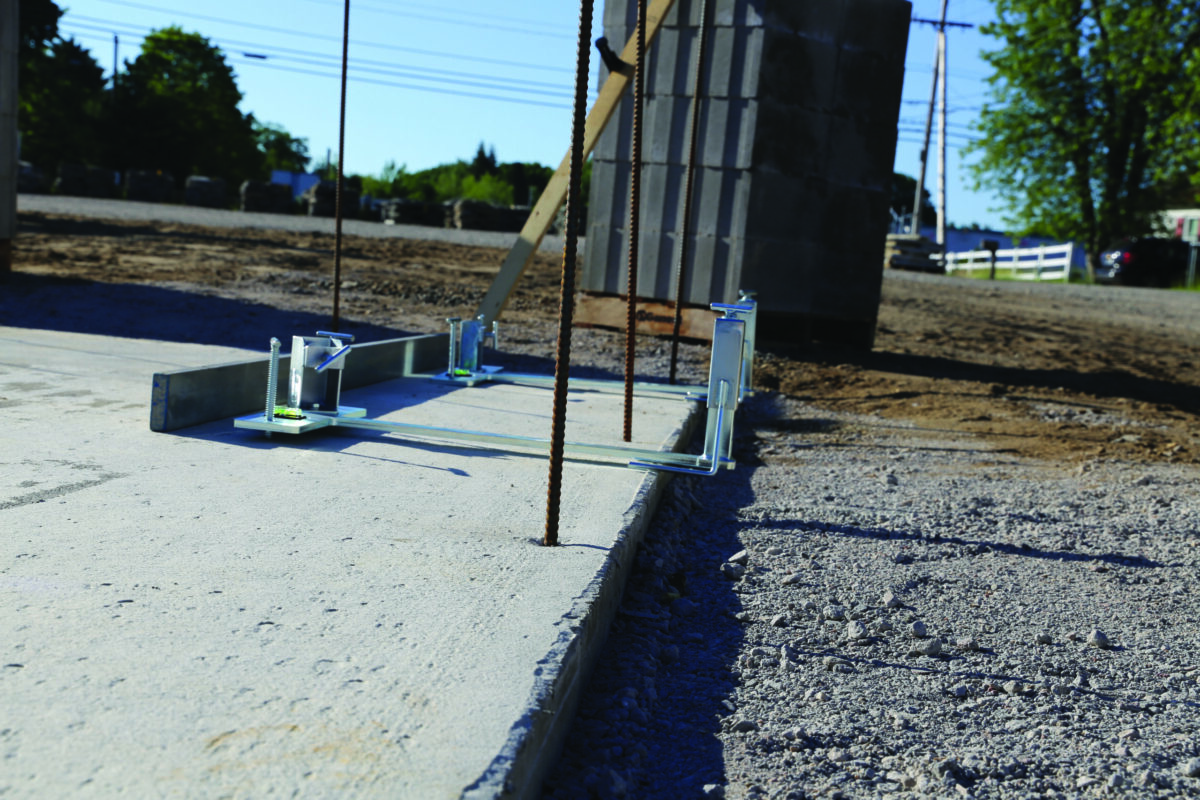
Step 2: Base Preparation
The preparation of the base course is the most critical stage of building a Comfort Block concrete wall system. The precision height of each Comfort Block means all interlocking concrete blocks will be automatically level with one another, so ensuring a level base course is essential.
When poured correctly, your footing should already be level, but standard mortar can be used to mitigate any variation in your foundation levels. Use a mortar leveling kit by lining up the two levelers and screeding mortar between them to easily establish a perfectly level surface of mortar.
Lay your first course of Comfort Block on your now level base, gently tapping with a rubber mallet to ensure the blocks are snug against one another.
What is a “course” of CMUs? A course is a single layer of concrete blocks or any masonry unit such as bricks or stones running horizontally in a wall. You may lay blocks one course at a time or build your corner lead and fill in the layers between them.
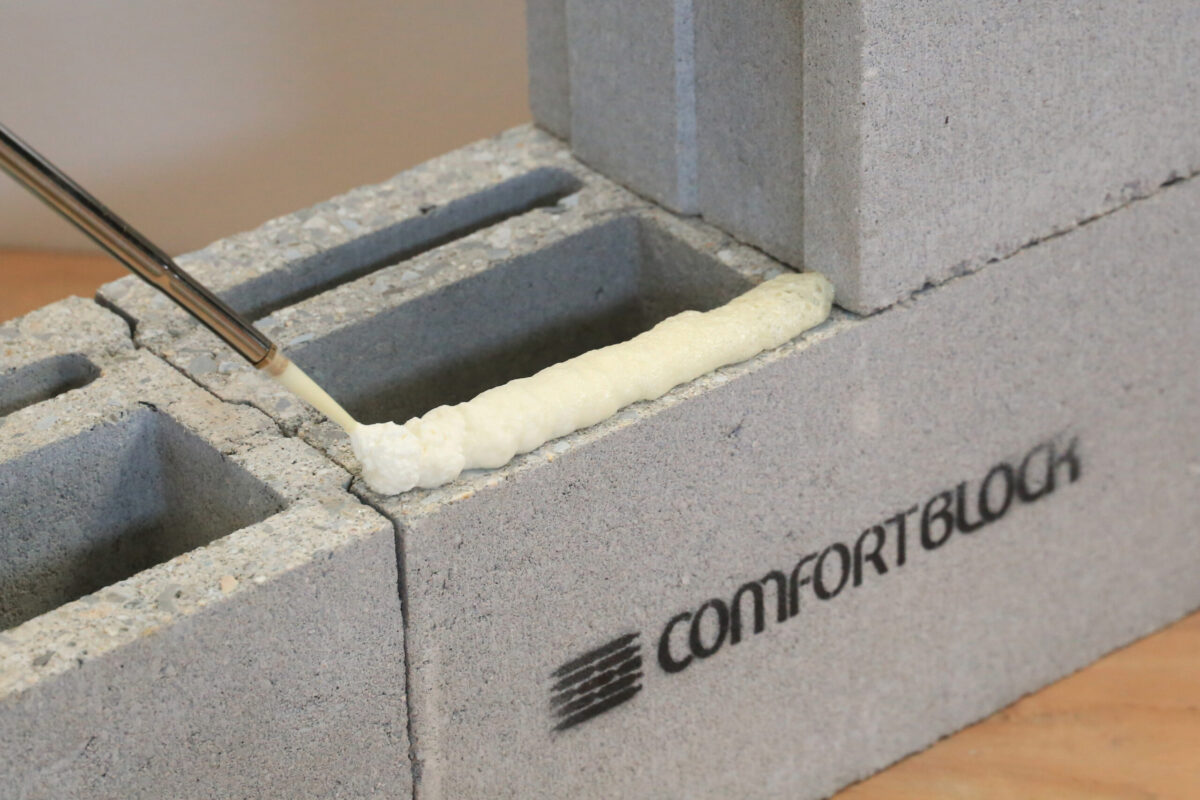
Step 3: Laying Blocks with Masonry Adhesive
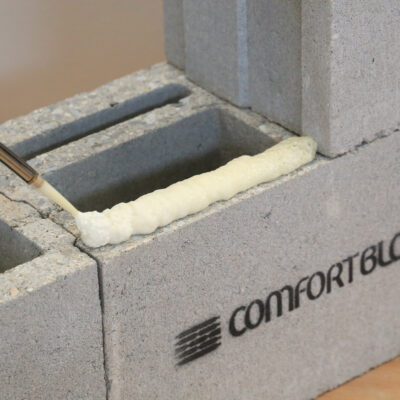
Once the base course is laid, there is no further need for mortar. TREMPRO® PU1000 is a masonry adhesive that has been approved under ICC-ES AC362 as an alternative to mortar exclusive to the Comfort Block systems. It sets within 30 minutes and is fully cured in 24 hours, so rebar and grout can be installed almost immediately and higher wall construction can be done in a single day.
Fit your can of masonry adhesive in a kangaroo holder for ease of application and apply at least two beads of adhesive on top of the outermost and innermost walls of each block. The working time of the adhesive is about 5 minutes, so you can apply it to several blocks at once. Lay the blocks next to each other using the interlocking design, eliminating the need for vertical adhesive. Repeat this process, moving a few blocks at a time, until all courses are complete.
Pro Tip: A water-suppressed masonry saw, chop saw, or bench cutting saw may be used to cut blocks to size for end caps or add holes for outlet boxes.
Step 4: Grouting
Rebar and grout should be used where needed according to normal masonry reinforcement requirements. Because Comfort Block cores are smaller than standard CMU blocks, grouting should be done before you exceed seven courses, and concrete sand can be used to fill walls as it has better flow and additional strength compared to traditional mortar sand. Be sure to clean any excess grout from the top of your concrete wall system before completing.
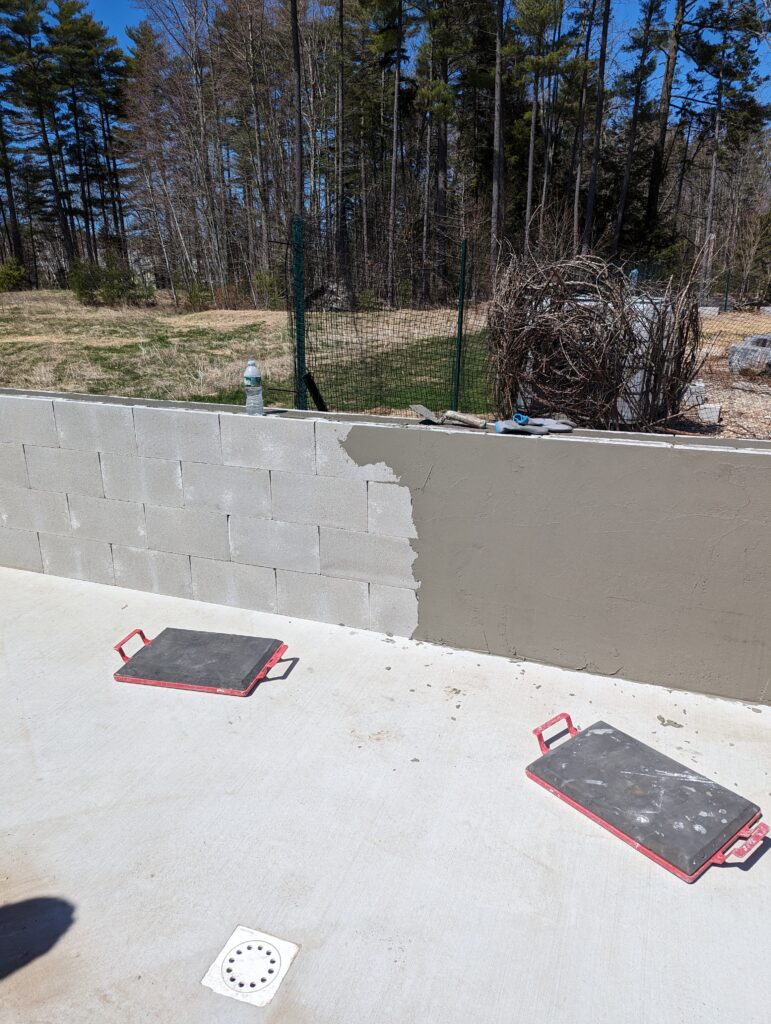
Step 5: Finishing Your Comfort Block Wall
Comfort Block walls require a finish to remain weather and air-tight. In most situations, weatherproofing can be done 30 minutes after construction, once the adhesive has set (some situations require a curing time of 24 hours before taking the final step in your block wall installation). Use a cement-based plaster finish, such as Universal Umaco 1023, to finish the interior and create a base coat on the exterior of your concrete wall system. Exterior walls must then be finished with your choice of architectural finish such as stucco, plaster, or thin stone veneer. Interior walls may be left as is or given an additional finish including drywall, tile, and more.
Watch A Comfort Block Shed Get Built in 1 Day
With just two people, this 350-block shed went up in less than a day thanks to the ease and speed of installing a concrete wall system using Comfort Block.